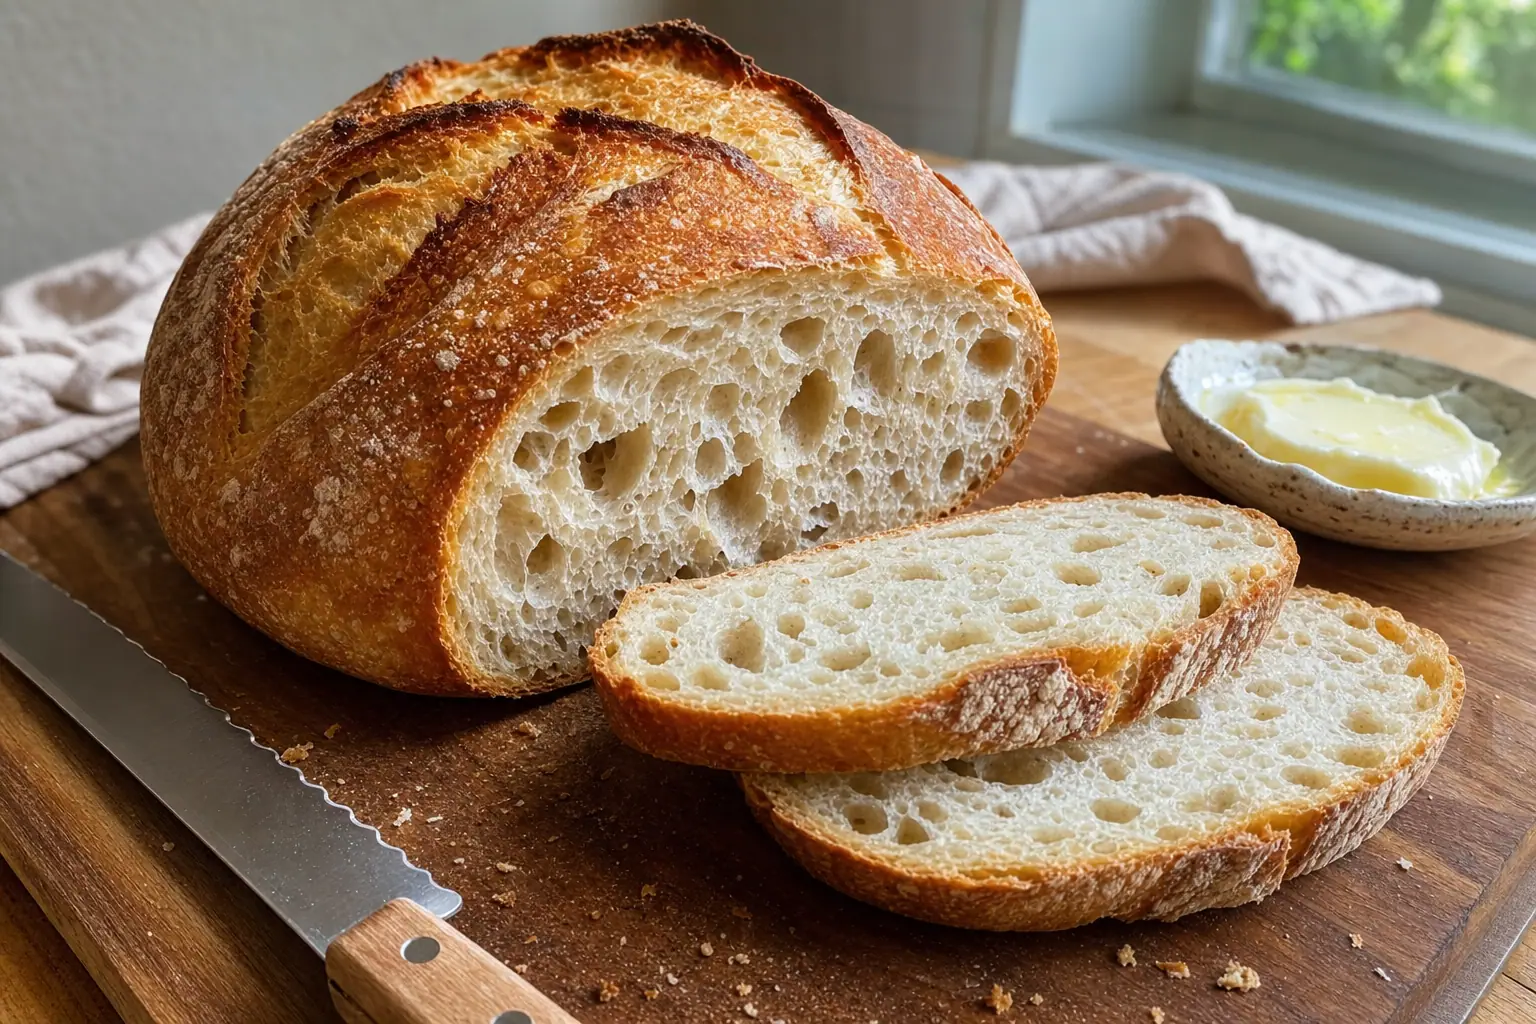
Sourdough Bread
A simple, steady sourdough loaf with a crisp crust, a chewy middle, and a gentle tang. This recipe uses one active starter and a slow rise to build flavor without making the process feel fussy.
Total
80 min
Servings
1 medium loaf, about 10 slices
Level
Medium
Sourdough bread is made with a living starter instead of packaged yeast. The starter helps the dough rise and gives the bread its light tang, open crumb, and deep golden crust.
This recipe is written for home bakers who have an active sourdough starter ready to use. The timing is flexible, but plan ahead: most of the work is waiting while the dough rests and ferments.
You do not need a mixer. A bowl, a kitchen scale, and a Dutch oven or heavy covered pot will make the process easier and more reliable.
01What you'll need
Ingredients
5 items · 1 medium loaf, about 10 slices
- 100 g active sourdough starter, bubbly and recently fed, about 1/2 cup
- 350 g water, room temperature, about 1 1/2 cups minus 1 tablespoon
- 500 g bread flour, about 4 cups, plus more for shaping
- 10 g fine sea salt, about 1 3/4 teaspoons
- Rice flour or all-purpose flour, for dusting the basket or towel
02How to make it
Step-by-step
1. Mix the dough
In a large bowl, stir together the active sourdough starter and water until mostly combined. Add the bread flour and salt. Mix with a spoon or your hands until no dry flour remains. The dough will look rough and sticky. Cover the bowl and let it rest for 30 minutes.
2. Stretch and fold
With damp hands, grab one side of the dough, stretch it upward, and fold it over the center. Turn the bowl and repeat 3 more times. This is called a stretch and fold; it builds strength without kneading. Cover and rest for 30 minutes.
3. Repeat the folds
Do 3 more rounds of stretch and folds, resting the dough for 30 minutes between each round. After the last round, the dough should feel smoother and more elastic. It may still be tacky, which is normal.
4. Let the dough bulk rise
Cover the bowl and let the dough rise at room temperature until it looks puffed, has a few bubbles on the surface, and has increased by about 50 percent. This usually takes 3 to 5 hours after the final fold, depending on the warmth of your kitchen and the strength of your starter.
5. Shape the loaf
Lightly flour the counter. Turn out the dough and gently shape it into a round by tucking the edges toward the center. Flip it seam-side down and use your hands or a bench scraper to pull it gently across the counter, creating surface tension. Let it rest for 15 minutes, then tighten the shape once more if it has spread a lot.
6. Chill the dough
Dust a proofing basket or a bowl lined with a clean towel with rice flour or all-purpose flour. Place the dough seam-side up in the basket. Cover and refrigerate for 8 to 16 hours. This slow cold rise adds flavor and makes the loaf easier to score.
7. Heat the oven
Place a Dutch oven with its lid in the oven and heat to 475°F for at least 30 minutes. Heating the pot first helps create steam, which lets the bread rise well before the crust sets.
8. Score and bake
Carefully turn the chilled dough onto a piece of parchment paper. Use a sharp knife or bread lame to cut one slash about 1/2 inch deep across the top. Lift the dough into the hot Dutch oven using the parchment. Cover and bake for 25 minutes. Remove the lid, lower the oven to 450°F, and bake for 15 to 20 minutes more, until deeply golden.
9. Cool before slicing
Transfer the bread to a wire rack and let it cool for at least 1 hour before slicing. The inside continues to set as it cools. Cutting too early can make the crumb gummy.
03From our kitchen
Cook's tips
- Make-ahead timing: Feed your starter in the morning, mix the dough when it is bubbly and active, shape it in the evening, then bake the next morning after the overnight chill.
- Storage: Keep the cooled loaf cut-side down on a cutting board for the first day. After that, store it in a paper bag or bread box for 2 to 3 days. Avoid the refrigerator, which makes bread stale faster.
- Freezing: Slice the fully cooled loaf, freeze the slices in a freezer bag, and toast from frozen. Use within 2 months for the best texture.
- Flour swap: Bread flour gives the loaf more chew and height. You can replace up to 100 g of the bread flour with whole wheat flour, but the dough may feel stickier and rise a little less.
- No Dutch oven: Bake on a preheated baking stone or heavy sheet pan. Add a metal pan to the lower rack and carefully pour in 1 cup of hot water when the loaf goes in to create steam. The crust may be slightly thinner.
- If the dough spreads: It may be over-proofed, too warm, or not shaped tightly enough. Bake it anyway. It will still taste good, even if it is flatter than expected.
Cook's note
This recipe assumes a 100 percent hydration sourdough starter, meaning it is fed with equal weights of flour and water. For the most reliable loaf, use a kitchen scale and an active starter that doubles within 4 to 8 hours after feeding.
04Frequently asked
Questions & answers
How do I know my sourdough starter is ready to use?
It should be bubbly, smell pleasantly tangy, and have risen noticeably after feeding. A good sign is that it doubles in size within 4 to 8 hours at room temperature.
Why is my sourdough bread dense?
Dense bread usually comes from a weak starter, not enough fermentation time, or cutting the loaf too soon. Make sure your starter is active, let the dough rise until it looks puffy, and cool the bread for at least 1 hour before slicing.
Can I make this sourdough bread without a scale?
You can use the cup measures as a guide, but a scale is strongly recommended. Small changes in flour or water can make sourdough feel very different, and grams are much more accurate.
Can I let the shaped dough chill longer than 16 hours?
Yes, but try not to go much past 24 hours. A longer chill can make the bread more sour, but it can also weaken the dough and lead to a flatter loaf.
What does scoring the dough do?
Scoring means cutting the surface of the dough before baking. It gives the bread a controlled place to expand in the oven instead of bursting randomly along the sides.
05Keep cooking
You might also like
 Breakfast
Sourdough Pancakes
These soft, lightly tangy sourdough pancakes are a smart way to use sourdough discard. The batter comes together in one bowl and cooks into fluffy, golden pancakes with crisp edges.
 Breakfast
Soft Cinnamon Rolls with Cream Cheese Glaze
These homemade cinnamon rolls are soft, buttery, and swirled with brown sugar cinnamon filling. The dough needs time to rise, but the method is simple and forgiving for a weekend breakfast or brunch.
 Breakfast
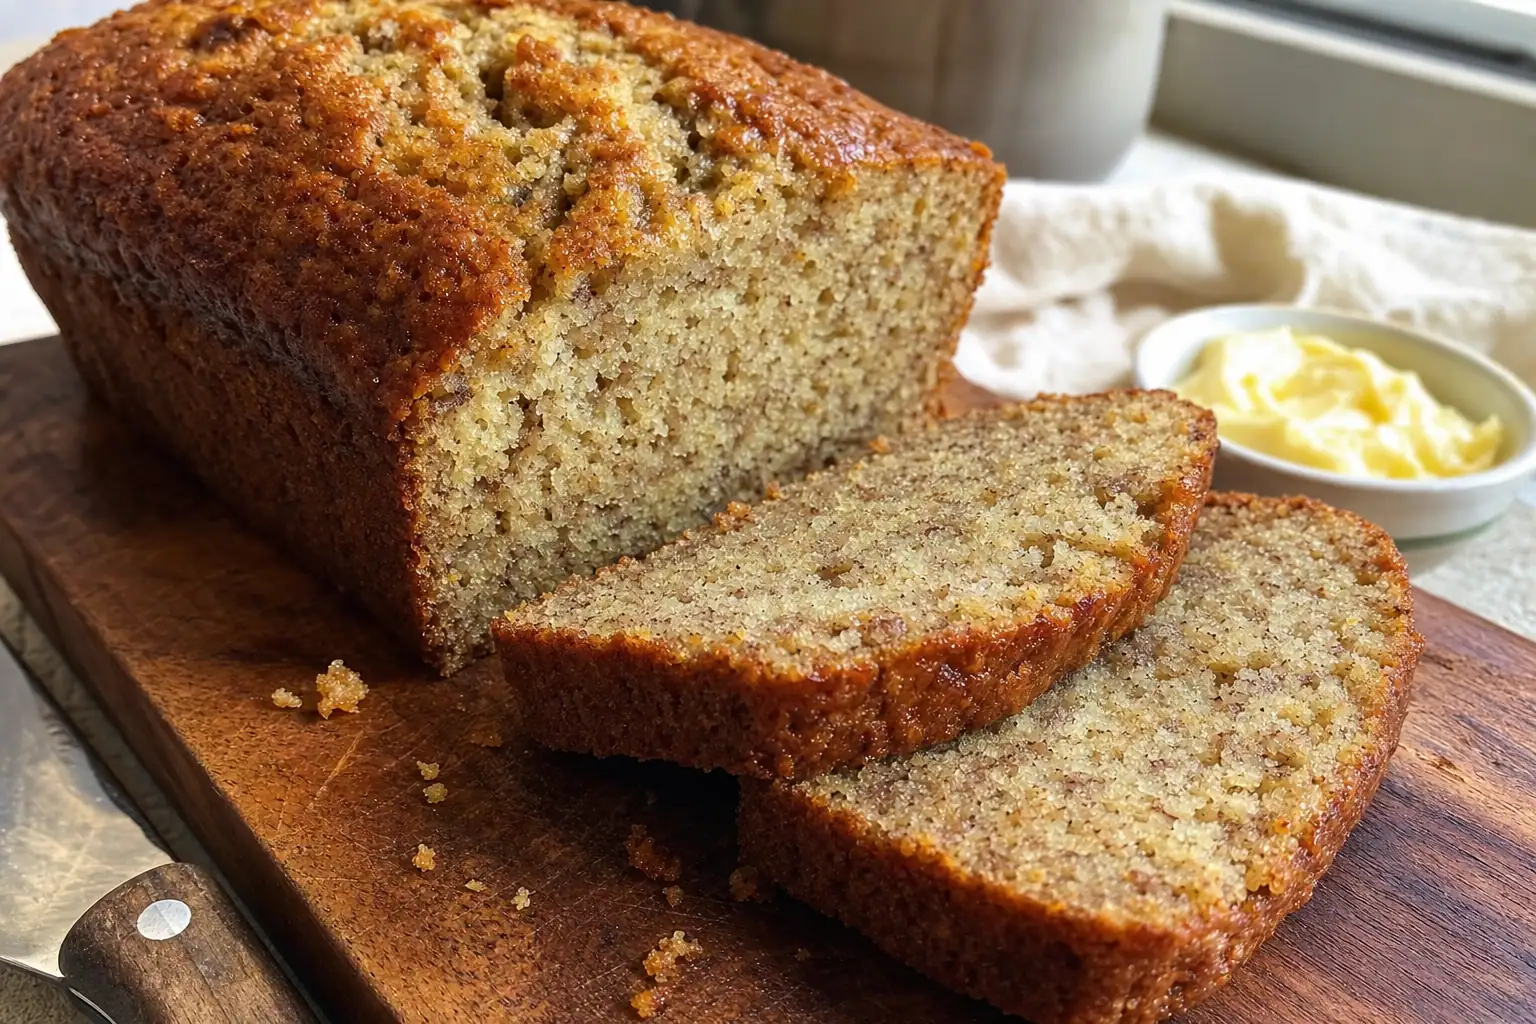
Classic Banana Bread
This easy banana bread is soft, lightly sweet, and made with pantry basics. It is a practical way to use up spotty bananas and makes a good breakfast, snack, or lunchbox slice.
 Breakfast
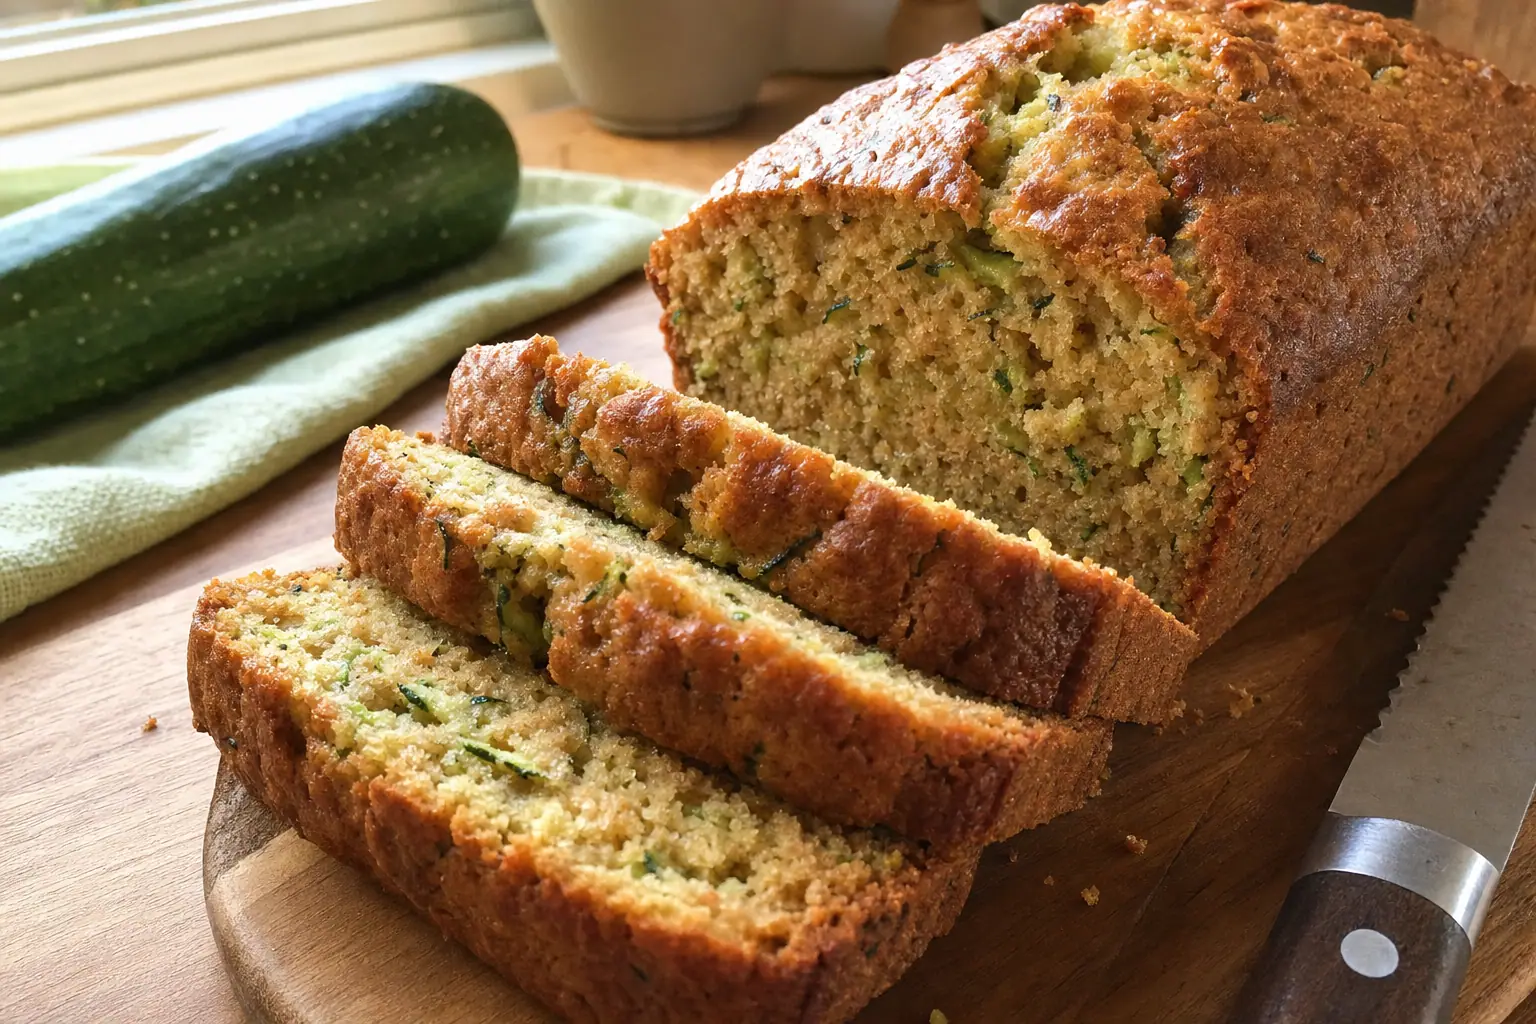
Zucchini Bread
This tender zucchini bread is lightly spiced, easy to mix by hand, and a smart way to use up summer squash. The shredded zucchini keeps the loaf moist without making it taste like vegetables.